

Parrot Clips: An Option For Parapet Walls
I constantly get asked what is the best method for securing luminarias on parapet walls. There are many ways that work. The best method will be determined by the person doing it. The biggest considerations include the cost and effort required to do it and also if the building will have to be modified to make it happen.
Parrot clips have been a known option for many years and definitely has proponents of this method. There is even a luminary company that manufactures and sells engineered parrot clips specifically for attaching their luminarias on buildings. We've had our own customers adapt these clips for use with our luminarias.
It is also possible to make your own parrot clips and that is what we are going to show you in this blog. First, I'd like to thank Steve Downham, from New Mexico, for providing clear photos showing the pieces and processes necessary to make your own clips!
3 Easy Steps -
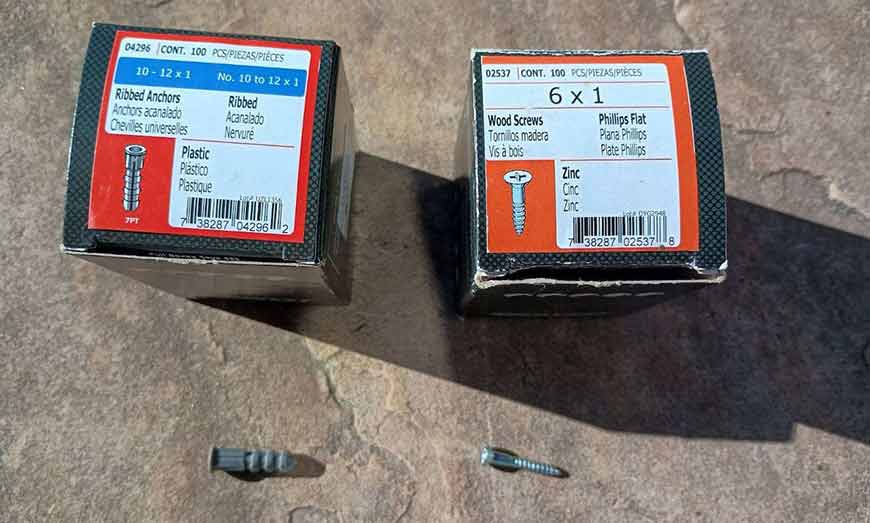
Step #1: Acquire materials. You can select varying materials. What was used here was aluminum flat bar, 1/2" by 1/16". I found it online at Home Depot for 10-cents an inch and sold in 36" lengths. You should be able to cut those in half and have 2 18" strips, enough for 2 luminaries from each flat bar. Then acquire screws and plastic anchors so you can mount your flat bars on your luminarias.
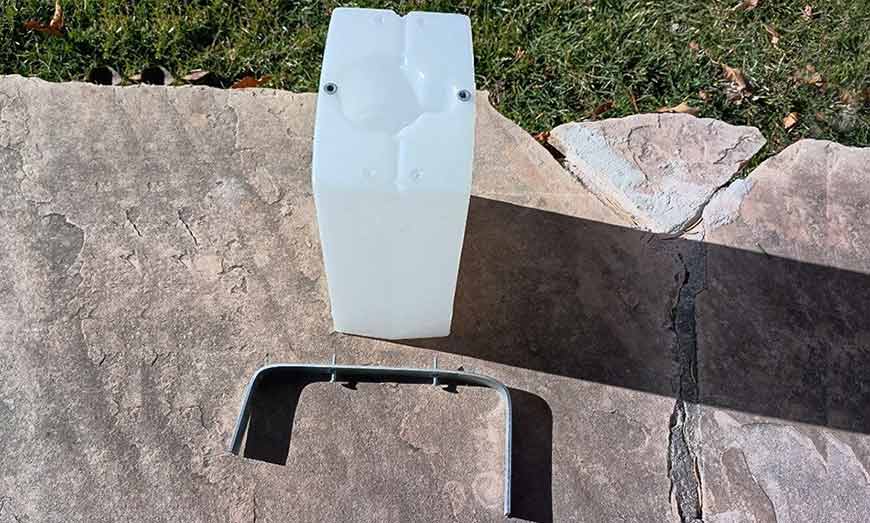
Step #2: Prepare materials. Take each 18" flat bar up to your parapet wall and form them to fit across the top of your wall. Next, drill out and place 2 anchors as shown in the following photo.
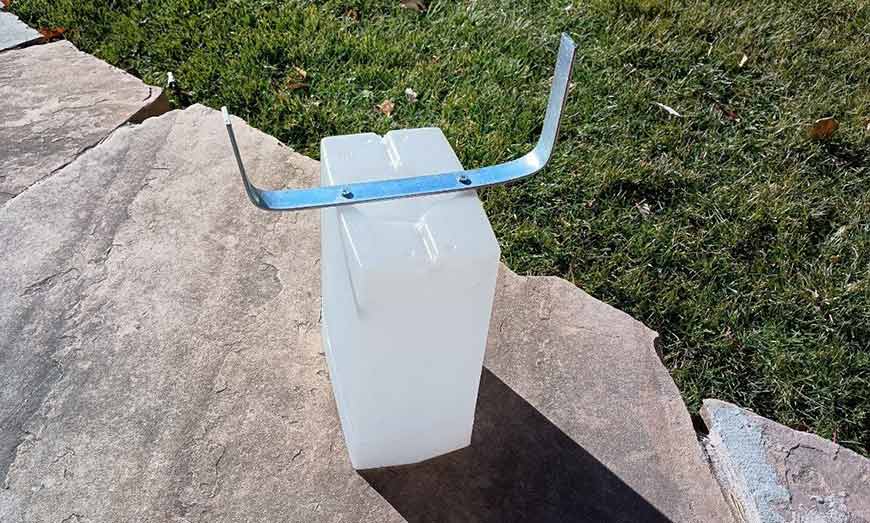
Step #3: Attach bar. Screw in your bent bars into your luminarias. Proceed with this step until all your luminarias have an attached parrot clip. If you want your parrot clips to better match the color of your wall, paint them before attaching to your luminarias. If you are painting metal (as shown here) you should consider a can of spray enamel paint made to be used on metal and sold at all hardware stores. See photo below.
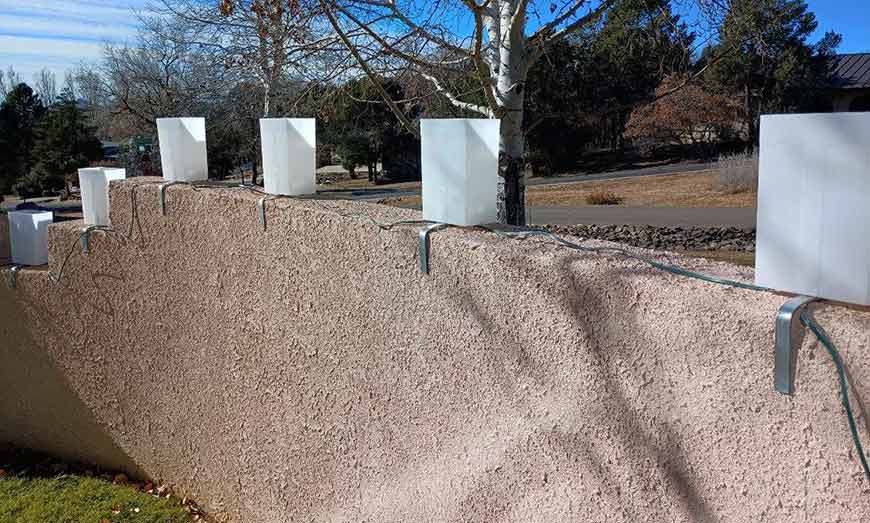
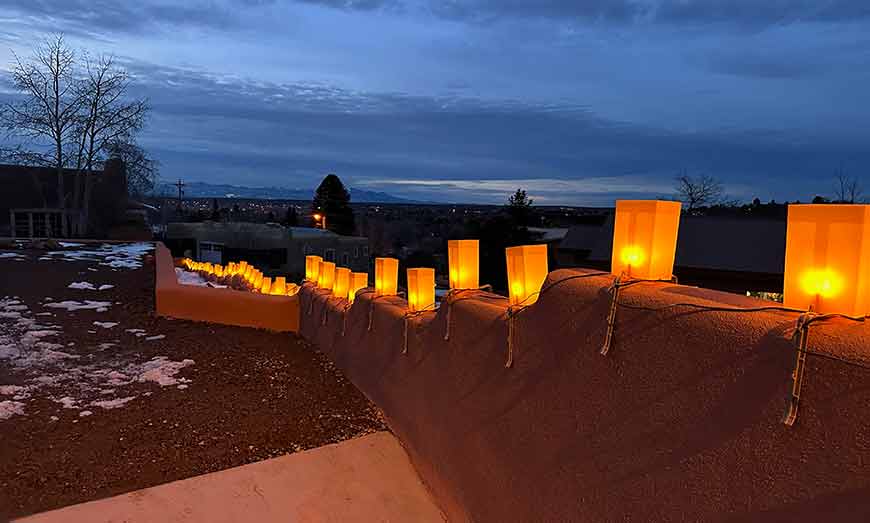
Now that you've attached your parrot clips the rest of your installation resembles a typical installation on the ground. Make sure you have your 4 drain holes knocked out on each luminaria. As you install make sure the front of the luminarias are going in the direction you want (usually outwards towards the street). Prepare your light string by having it going in the right direction (the male plug in where your power supply is). Screw in bulbs to each luminaria while setting them up on the wall. Do not apply power on until all bulbs are luminarias are done! After you have a set complete, plug in your light string to test your lights. You may have to adjust a bulb or two so they all work. Turn the power off before making those adjustments then turn power back on to test. After completing one light string start the next string. Make sure you are not plugged into power and repeat the above steps including testing after complete. On the very last luminary, you may wish to curl the small end plug underneath the luminary to hide it from being seen and protect it from collecting water in the plug.
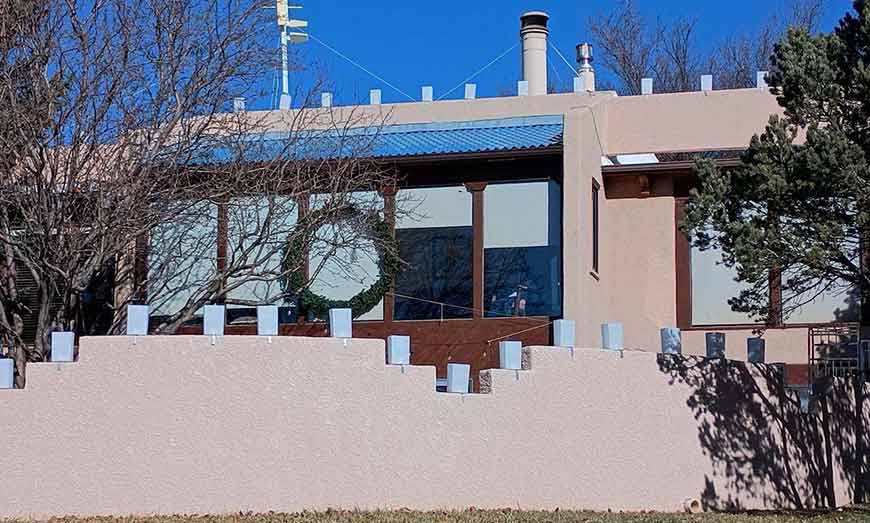
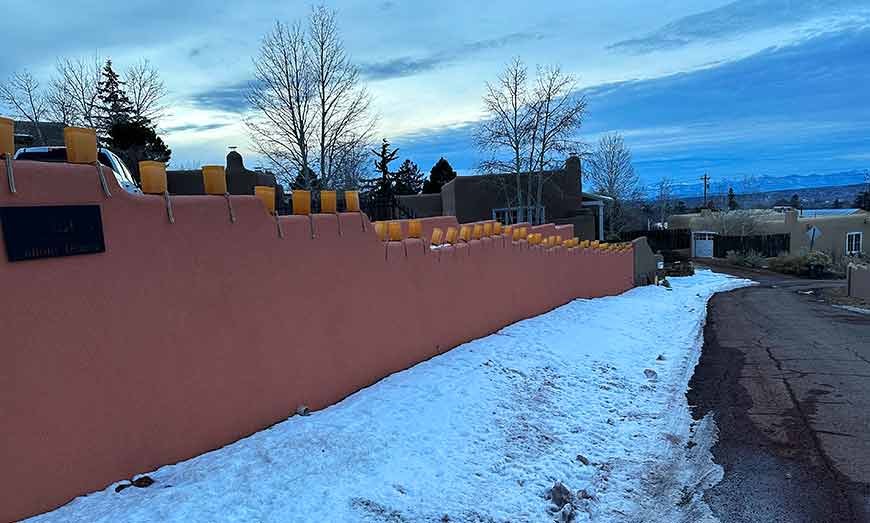
If you prefer to buy pre-made parrot clips, you can buy them HERE. These clips are plastic and not as durable, but is an option. The following two photos show you these clips in use.
Leave a CommentLeave a Reply
Latest Comments
-

Melissa Hernandez
on FLIC atop Parks Legado Shopping Center! -

Donna Parsons
on Have A Successful Luminary Fundraiser -

Thom Mullins
on Have A Successful Luminary Fundraiser -

Carol Billings
on FLIC Luminaries, Mardi Gras, and House Floats!